1、编译内核的前提准备:
1> 开发环境
CentOS 6/7 :
~]# yum -y groupinstall “Development Tools” “Server Platform Development”
~]# yum -y install ncurses ncurses-devel
2> 获取目标主机上硬件设备的相关信息;
获取CPU信息:
~]# cat /proc/cpuinfo
~]# lscpu
~]# x86info -a [CentOS 6 可用;]
获取PCI信息:
~]# lspci [ CentOS 6 可用;]
~]# lsusb [ CentOS 6 可用;]
~]# lsblk
~]# hal-device [ CentOS 6 可用;]
3> 获取目标主机系统功能的相关信息,比如要安装的文件系统格式;
4> 获取内核源代码包:www.kernel.org;
内核源代码最好放在’/usr/src’目录下;
2、内核编译前相关说明:
2.1 解压、做软连接:
~]# tar xf linux-VERSION.tar.xz -C /usr/src
~]# ln -sv linux-VERSION linux
2.2 进入软连接目录,进行编译:
~]# cd linux
[root@kou linux]# make help 查看编译帮助手册;
‘configuration targets’中的编译方式,选择其中一种即可,区别是每种方式的编译需求环境不一样而已;
Cleaning targets:
  clean           - Remove most generated files but keep the config and
                    enough build support to build external modules
  mrproper        - Remove all generated files + config + various backup files
  distclean       - mrproper + remove editor backup and patch files

Configuration targets:                             'Configuration targets'选项中选一种方式即可,每种方式需要的编译环境可能不太一样而已;
  config          - Update current config utilising a line-oriented program
  nconfig         - Update current config utilising a ncurses menu based program
  menuconfig      - Update current config utilising a menu based program
  xconfig         - Update current config utilising a QT based front-end
  gconfig         - Update current config utilising a GTK based front-end
  oldconfig       - Update current config utilising a provided .config as base
  localmodconfig  - Update current config disabling modules not loaded
  localyesconfig  - Update current config converting local mods to core
  silentoldconfig - Same as oldconfig, but quietly, additionally update deps
  defconfig       - New config with default from ARCH supplied defconfig
  savedefconfig   - Save current config as ./defconfig (minimal config)
  allnoconfig     - New config where all options are answered with no
  allyesconfig    - New config where all options are accepted with yes
  allmodconfig    - New config selecting modules when possible
  alldefconfig    - New config with all symbols set to default
  randconfig      - New config with random answer to all options
  listnewconfig   - List new options
  olddefconfig    - Same as silentoldconfig but sets new symbols to their default value

Other generic targets:
  all             - Build all targets marked with [*]
* vmlinux         - Build the bare kernel
* modules         - Build all modules
  modules_install - Install all modules to INSTALL_MOD_PATH (default: /)
  firmware_install- Install all firmware to INSTALL_FW_PATH
                    (default: $(INSTALL_MOD_PATH)/lib/firmware)
  dir/            - Build all files in dir and below
  dir/file.[oisS] - Build specified target only
  dir/file.lst    - Build specified mixed source/assembly target only
                    (requires a recent binutils and recent build (System.map))
  dir/file.ko     - Build module including final link
  modules_prepare - Set up for building external modules
  tags/TAGS       - Generate tags file for editors
  cscope          - Generate cscope index
  gtags           - Generate GNU GLOBAL index
  kernelrelease   - Output the release version string
  kernelversion   - Output the version stored in Makefile
  image_name      - Output the image name
  headers_install - Install sanitised kernel headers to INSTALL_HDR_PATH
                    (default: ./usr)

Static analysers
  checkstack      - Generate a list of stack hogs
  namespacecheck  - Name space analysis on compiled kernel
  versioncheck    - Sanity check on version.h usage
  includecheck    - Check for duplicate included header files
  export_report   - List the usages of all exported symbols
  headers_check   - Sanity check on exported headers
  headerdep       - Detect inclusion cycles in headers
  coccicheck      - Check with Coccinelle.

Kernel packaging:
  rpm-pkg             - Build both source and binary RPM kernel packages
  binrpm-pkg          - Build only the binary kernel package
  deb-pkg             - Build the kernel as a deb package
  tar-pkg             - Build the kernel as an uncompressed tarball
  targz-pkg           - Build the kernel as a gzip compressed tarball
  tarbz2-pkg          - Build the kernel as a bzip2 compressed tarball
  tarxz-pkg           - Build the kernel as a xz compressed tarball
  perf-tar-src-pkg    - Build perf-3.16.56.tar source tarball
  perf-targz-src-pkg  - Build perf-3.16.56.tar.gz source tarball
  perf-tarbz2-src-pkg - Build perf-3.16.56.tar.bz2 source tarball
  perf-tarxz-src-pkg  - Build perf-3.16.56.tar.xz source tarball

Documentation targets:
 Linux kernel internal documentation in different formats:
  htmldocs        - HTML
  pdfdocs         - PDF
  psdocs          - Postscript
  xmldocs         - XML DocBook
  mandocs         - man pages
  installmandocs  - install man pages generated by mandocs
  cleandocs       - clean all generated DocBook files

Architecture specific targets (x86):
* bzImage      - Compressed kernel image (arch/x86/boot/bzImage)
  install      - Install kernel using
                  (your) ~/bin/installkernel or
                  (distribution) /sbin/installkernel or
                  install to $(INSTALL_PATH) and run lilo
  fdimage      - Create 1.4MB boot floppy image (arch/x86/boot/fdimage)
  fdimage144   - Create 1.4MB boot floppy image (arch/x86/boot/fdimage)
  fdimage288   - Create 2.8MB boot floppy image (arch/x86/boot/fdimage)
  isoimage     - Create a boot CD-ROM image (arch/x86/boot/image.iso)
                  bzdisk/fdimage*/isoimage also accept:
                  FDARGS="..."  arguments for the booted kernel
                  FDINITRD=file initrd for the booted kernel
  kvmconfig     - Enable additional options for guest kernel support

  x86_64_defconfig         - Build for x86_64
  i386_defconfig           - Build for i386

  make V=0|1 [targets] 0 => quiet build (default), 1 => verbose build
  make V=2   [targets] 2 => give reason for rebuild of target
  make O=dir [targets] Locate all output files in "dir", including .config
  make C=1   [targets] Check all c source with $CHECK (sparse by default)
  make C=2   [targets] Force check of all c source with $CHECK
  make RECORDMCOUNT_WARN=1 [targets] Warn about ignored mcount sections
  make W=n   [targets] Enable extra gcc checks, n=1,2,3 where
                1: warnings which may be relevant and do not occur too often
                2: warnings which occur quite often but may still be relevant
                3: more obscure warnings, can most likely be ignored
                Multiple levels can be combined with W=12 or W=123

Execute "make" or "make all" to build all targets marked with [*]
For further info see the ./README file
1> 举例几个编译方式的解释:
————————–
~]# make menuconfig 打开一个文本菜单界面进行操作; <配置内核选项>
~]# make xconfig 需要QT环境,KDE桌面环境及桌面开发环境; <配置内核选项>
~]# make gconfig 需要GTK环境,GNOME桌面环境及桌面开发环境; <配置内核选项>
备注:如果上面2个桌面环境已安装好,则可用ssh命令带选项’-X’远程连接上去编译内核:~]# ssh -X root@IP
2> 加载内核模块的3种表现方式:
[ ] 不编译、不启用此模块功能 , excluded;
[M] 编译成模块 , module;
[*] 编译进内核核心 , built-in;
<> module capable ;
3> 红帽系列的发行版中,在’/boot’目录下有个文件,用于记录内核编译选项,即模块的安装方式以及安装的模块的类型与数量;
此文件名称为’config-VERSION’; 本机的配置文件模板为’config-3.10.0-693.el7.x86_64′
[root@kou ~]#
[root@kou ~]# ls /boot
config-3.10.0-693.el7.x86_64                             initrd-plymouth.img
efi                                                      symvers-3.10.0-693.el7.x86_64.gz
grub                                                     System.map-3.10.0-693.el7.x86_64
grub2                                                    vmlinuz-0-rescue-680b1a9519434f3c985bbc83db90af96
initramfs-0-rescue-680b1a9519434f3c985bbc83db90af96.img  vmlinuz-3.10.0-693.el7.x86_64
initramfs-3.10.0-693.el7.x86_64.img
[root@kou ~]#
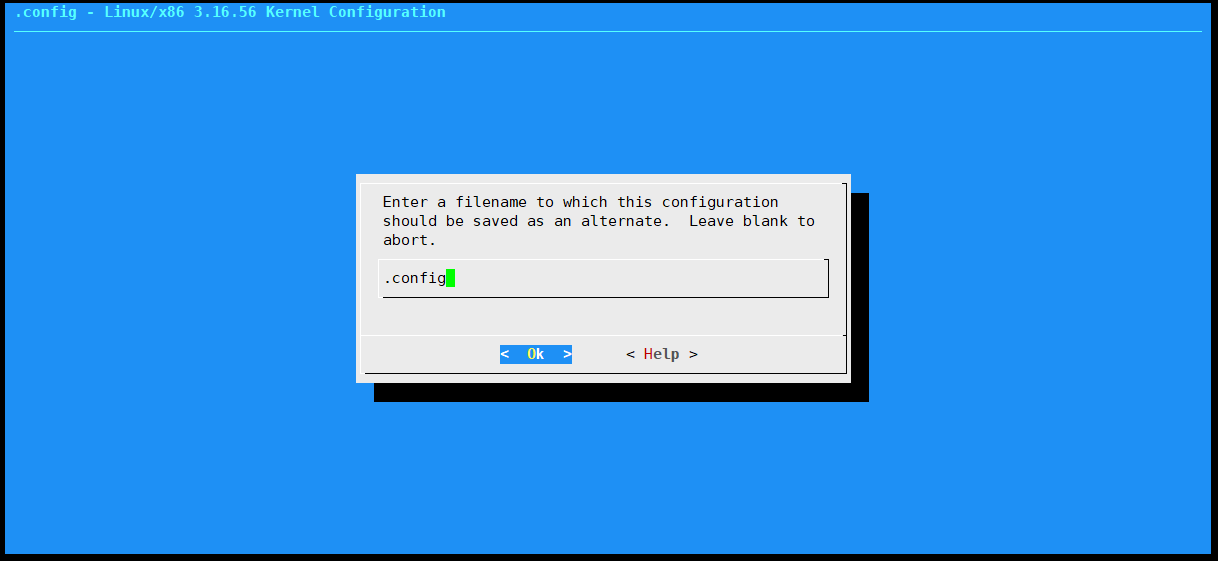
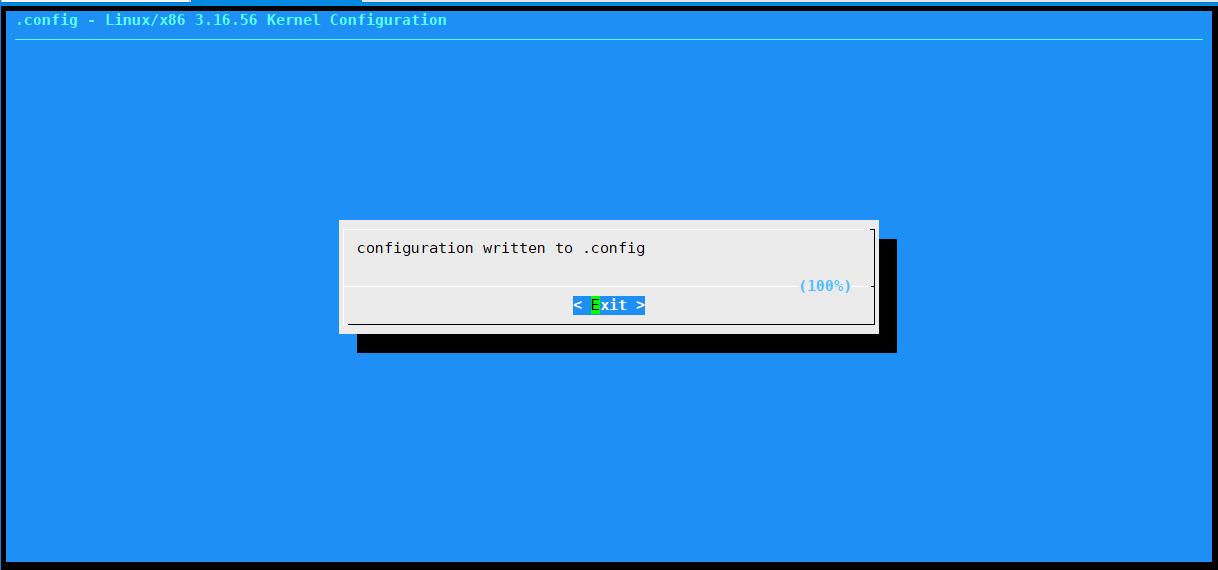
可把上面的编译配置文件模板拷贝到新编译内核的目录中,重命名为’.config’的隐藏文件;
但此种操作有弊端,发行商编译内核时基本上都是尽可能的编译多的模块,比如对网卡设备模块,我们实际用到的只有
本机的特定厂商的特定型号,所以即使拷贝了模板文件,仍然需要对此文件进行过滤刷选;
[root@kou ~]# cp /boot/config-3.10.0-693.el7.x86_64 /usr/src/linux/.config
~]# make [-j #] CPU是多核心多线程情况下,可启动多线程进行编译; <编译过程>
~]# make modules_install <安装内核模块>
~]# make install <安装内核核心>
3> 编译过程需要时间,如果远程连接服务器进行操作,如果由于网络原因导致远程连接中断,而编译操作尚未完成,则之前的编译工作化为泡影;
可使用’screen’命令,在编译操作前输入此命令,重新打开一个屏幕,然后再进行编译相关的命令操作,操作过程中可使用’ctrl+a, d’组合命令
进行’screen’的拆除操作;拆除后,即使远程连接中断,在重新连接到服务器后可指定’screen’列表中指定的条目的ID号,使用命令’screen -r ID’
就可重新进入之前的操作环境;具体说明与应用如下所示:
screen命令:
screen manager with VT100/ANSI terminal emulation
使用VT100/ANSI终端仿真的屏幕管理器;
~]# yum -y install screen

~]# screen       远程连接上服务器后,用此命令可打开一个新的屏幕,在新屏幕下可正常操作其他命令;

ctrl+a, d        拆除操作,操作过程中可按组合键'ctrl+a',松开后,再按'd',可拆除已打开的'screen';拆除后,此操作会记录在'screen'列表中;

~]# screen -ls   此时,如果远程中断了,重新远程连接后,使用此命令,可以看到上次拆除的'screen'列表;列表内容可以有多条;

~]# screen -r  SCREEN_ID    指定上面查询到的'screen'列表中的某条记录的ID号,可重新打开屏幕进行接续操作;

~]# exit          如果在'screen'屏幕环境下用此命令,则此'screen'条目将失效,不会记录保存到'screen'列表中;
3、完整编译步骤(举例):
1> 查看当前系统的内核版本
[root@kou ~]# ll /boot/vmlinuz-3.10.0-693.el7.x86_64
-rwxr-xr-x. 1 root root 5877760 Aug 23  2017 /boot/vmlinuz-3.10.0-693.el7.x86_64
[root@kou ~]#
2> 解压新下载的内核压缩包到’/usr/src’目录中;
[root@kou ~]#
[root@kou ~]# tar xf /usr/local/src/linux-3.16.56.tar.xz -C /usr/src
[root@kou ~]#
3> 创建软连接,以备后期做版本升级滚动操作:
[root@kou ~]#
[root@kou ~]# cd /usr/src
[root@kou src]#
[root@kou src]# ll
total 4
drwxr-xr-x.  2 root root    6 Nov  5  2016 debug
drwxr-xr-x.  3 root root   45 May 21 10:47 kernels
drwxrwxr-x. 23 root root 4096 Mar 20 02:59 linux-3.16.56
[root@kou src]#
[root@kou src]# ln -s linux-3.16.56/ linux
[root@kou src]#
[root@kou src]# ll
total 4
drwxr-xr-x.  2 root root    6 Nov  5  2016 debug
drwxr-xr-x.  3 root root   45 May 21 10:47 kernels
lrwxrwxrwx.  1 root root   14 May 21 10:55 linux -> linux-3.16.56/
drwxrwxr-x. 23 root root 4096 Mar 20 02:59 linux-3.16.56
[root@kou src]#

[root@kou src]# cd linux
[root@kou linux]#
[root@kou linux]# ls
arch     CREDITS        drivers   include  Kbuild   lib          mm      REPORTING-BUGS  security  usr
block    crypto         firmware  init     Kconfig  MAINTAINERS  net     samples         sound     virt
COPYING  Documentation  fs        ipc      kernel   Makefile     README  scripts         tools
[root@kou linux]#
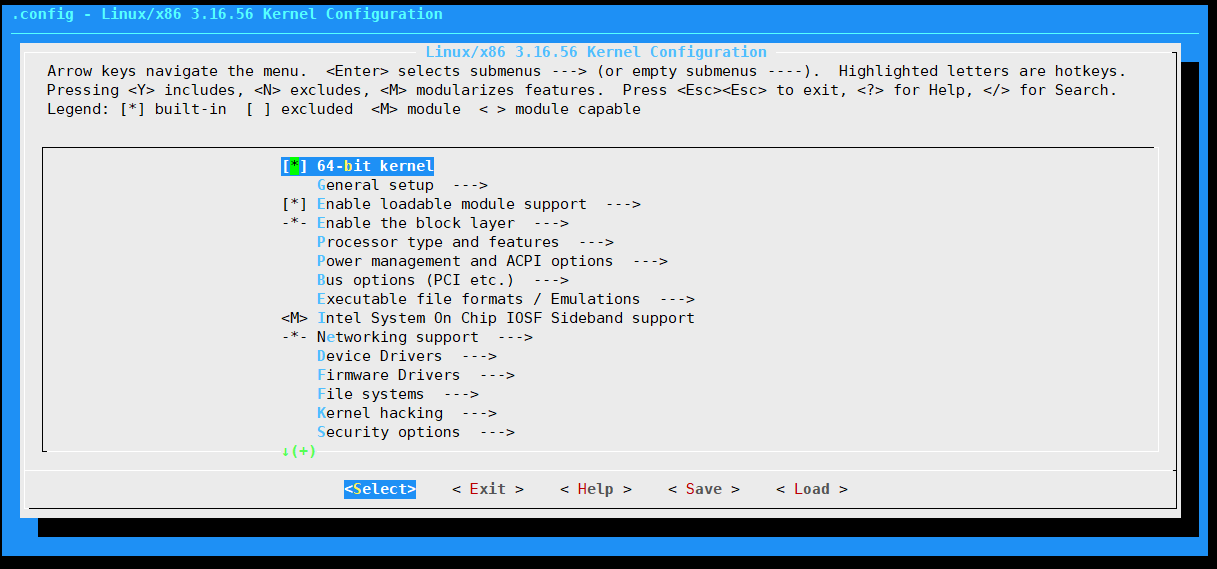
4> 配置内核选项’make menuconfig’
‘menuconfig’编译方式需要’ncurses’以及’ncurses-devel’的依赖;
[root@kou linux]# yum -y install ncurses ncurses-devel
[root@kou linux]# make menuconfig 打开文本图形界面;
5> 编译过程’make’;
[root@kou linux]# make

  CC      kernel/itimer.o
  HZFILE  kernel/hz.bc
  BC      kernel/timeconst.h
/bin/sh: bc: command not found
make[1]: *** [kernel/timeconst.h] Error 127
make: *** [kernel] Error 2
[root@kou linux]#

上面提示错误,安装'bc'命令即可; 安装完后重新执行'make'进行编译;
[root@kou linux]# yum -y install bc


备注:
编译需要时间,在多核多线程服务器上最好启用多线程编译方式,编译速度会快很多;
本机是vm虚拟机,单核双线程,模块安装采取默认,上面步骤的编译总时长为40分钟左右;
6> 安装内核模块’make modules_install’;
~]# make modules_install
7> 安装内核核心’make install’;
~]# make install
安装完成后,查看目录内容:
[root@kou linux]#
[root@kou linux]# ls -a
.        crypto         init      MAINTAINERS          net               signing_key.x509  .tmp_vmlinux1  .vmlinux.cmd
..       Documentation  ipc       Makefile             README            sound             .tmp_vmlinux2  vmlinux.o
arch     drivers        Kbuild    .missing-syscalls.d  REPORTING-BUGS    System.map        tools          x509.genkey
block    firmware       Kconfig   mm                   samples           .tmp_kallsyms1.o  usr
.config  fs             kernel    modules.builtin      scripts           .tmp_kallsyms2.o  .version
COPYING  .gitignore     lib       modules.order        security          .tmp_System.map   virt
CREDITS  include        .mailmap  Module.symvers       signing_key.priv  .tmp_versions     vmlinux
重启系统,选择新内核进入系统:
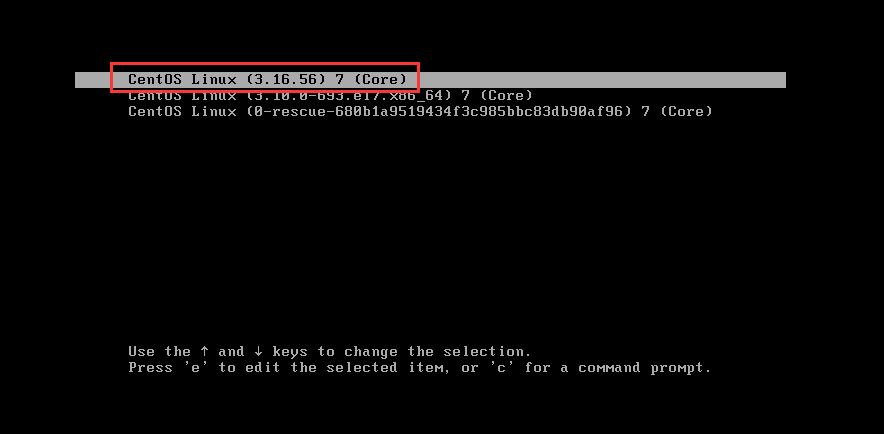
[root@kou ~]#
[root@kou ~]# uname -r
3.16.56
[root@kou ~]#
4、配置内核选项(模块选择及安装方式)<补充说明>
4.1 支持”更新”模式进行配置,在已有的’.config’文件基础上进行”修改”配置;
1> make config 基于命令行以遍历的方式去配置内核中可配置的每个选项;
2> make menuconfig 基于’ncurses’的文本配置窗口;
3> make xconfig 基于QT开发环境的窗口界面;需要KDE的桌面开发库
4> make gconfig 基于GTK开发环境的窗口界面;需要GTK的桌面开发库
4.2 支持”全新配置”模式进行配置;
1> make defconfig 基于内核为目标平台提供的”默认配置”为模板进行配置;不会去读取’.config’配置文件;
2> make allnoconfig 所有模块选项均为’no’;
5、编译过程<补充说明>
5.1 多线程编译:make [-j #]
5.2 编译内核中的一部分代码:
1> 只编译某子目录中的相关代码:
~]# cd /usr/src/linux
~]# make path/to/dir 编译的时候指定子目录;
2> 只编译一个特定的模块(不能使用命令’make modules_install’)
~]# cd /usr/src/linux
~]# make path/to/dir/file.ko
‘path/to/dir’ : 表示要进入的某个子目录;
‘file.ko’ : 在内核源码包(解压后的子目录)中有相关的模块文件,文件名称为”FILE.c”,是以’.c’为结尾的文件;
在用命令’make’进行模块编译的时候,需要把文件尾部格式更改为’.ko’结尾,注意不是更改源文件,
而是在上面命令进行单个内核模块编译的时候指定的;
备注,单独编译指定的内核模块,编译完成后,需要手动复制到系统的内核模块默认保存路径”/lib/modules/KERNEL_VERSION/kernel/”中的相关子目录中;
[root@kou linux]# ll /lib/modules/3.16.56/kernel/
total 16
drwxr-xr-x.  3 root root   17 May 21 12:35 arch
drwxr-xr-x.  3 root root 4096 May 21 12:35 crypto
drwxr-xr-x.  4 root root   42 May 21 12:35 Documentation
drwxr-xr-x. 65 root root 4096 May 21 12:36 drivers
drwxr-xr-x. 25 root root 4096 May 21 12:36 fs
drwxr-xr-x.  3 root root   19 May 21 12:36 kernel
drwxr-xr-x.  4 root root  202 May 21 12:36 lib
drwxr-xr-x.  2 root root   32 May 21 12:36 mm
drwxr-xr-x. 32 root root 4096 May 21 12:37 net
drwxr-xr-x. 10 root root  145 May 21 12:37 sound
[root@kou linux]#
6、在执行过编译操作的内核源码树上做重新编译
重新编译之前需要先做清理操作(3种方式):
make clean : 清理编译生成的绝大多数文件,但会保留’.config’文件及编译外部模块所需要的文件;
make mrproper : 清理编译生成的所有文件,包括配置生成的’.config’文件及某些备份文件;
make distclean : 相当于”make mrproper”,另额外清理各种patches及编辑器备份文件;
7、交叉编译
目标平台与当前编译操作所在的平台不同;
使用如下命令:
~]# make ARCH=arch_name menuconfig 余下步骤省略;
查看’arch_name’ 的帮助信息:
~]# make ARCH=arch_name help